Setup Email
Use the following instructions to set up your email address(es) to be able to send emails directly from Church Windows.
- From The Initial Portal of Church Windows choose either Membership or Donations
- Click Reports / Export in the Button Bar at the top of the screen
- Click Send Email
- This will open the Email window. There are three tabs here: Givers / People Tab, Giving / Pledging Tab, and Accounts tab.
- To setup email, simply click → Next without selecting any criteria.
Email Settings
Different Users may set up the email settings for the email account they wish to use for sending the emails from. For example, the Office Administrator may want to email newsletters or individuals; the Choir Director may want to email the members of the choirs; and the Treasurer may want to send Donation Statements, each can configure their own email account from which to send messages. The information entered for each user will be saved; it will only need to be entered once.
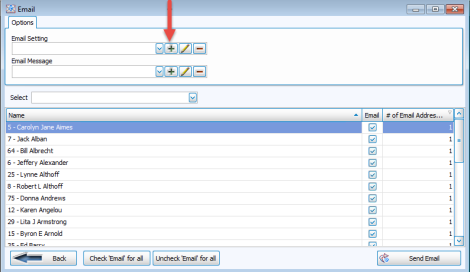
On the Options tab of the Send Email screen in any module, there is a  dropdown field for the Email Setting.
- To add a new email address, you will need to create a new email setting by clicking the
 Add button beside the field:
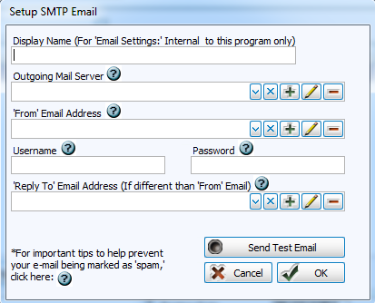
 - The Setup SMTP Email screen opens, which stores the settings that make it possible for you to email people out of the database:
- Display name (For ‘Email Settings:’ Internal to this program only):
The name entered in this box is the name under which the settings you make on this screen will be saved. This then allows you to choose a Display Name for the Email Settings box on the Options tab. Different groups within the Church can be set up with their own Display Name for different email addresses. An example might be Secretary’s Mailings or Pastor. - Outgoing Mail Server (SMTP):
Select an existing name from the dropdown box, or if you have not yet set this up, click the Add button to open the SMTP Server settings: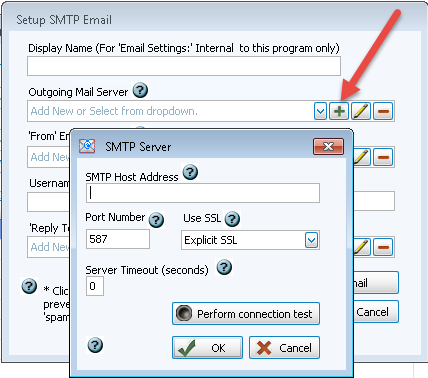
Note:
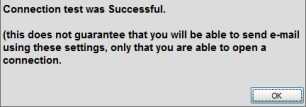
The SMTP Host, Port, and SSL information must be valid for your email address provider (e.g. gmail, verizon, sbcglobal, aol, etc.), this information must be obtained by contacting the customer support for your Internet Service Provider or ISP (which is the company that provides your internet connection) and/or the company hosting your email address, or by searching the internet. Church Windows has no way of obtaining this information for you. - When the information has been entered on this screen, you must click "Perform Connection Test". If successful, you should receive a message similar to this:
- If the connection test was successful, click OK.
- If the connection test fails, the data entered is wrong.
- Verify that you have entered the SMTP settings or contact your Internet Service Provider (the company that hosts your email address) to obtain the correct settings.
- ‘From’ Email Address:
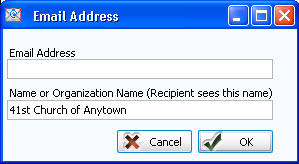
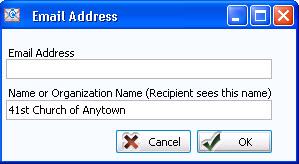
Select an existing email address from the dropdown box. Or, click the Add button to enter your (or your organization’s) email address:- This is the address your email will be sent from.
- Email Address: Enter the full email address including the @ and .com or .org part.
- Name or Organization Name: Enter the name you want recipients to see when they receive your emails.
- Username:
This is the your full email address including the @ and .com or .org part. - Password:
This is the password you already use to log into your ‘From’ Email Address: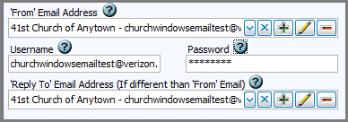
Important!
Whenever you change your password for your email address, you MUST also change it here in these email settings in order to continue using that address in Church Windows.
- ‘Reply To’ Email Address (If different than ‘From’ Email): (Optional)
Click the Add button to set up the email address people will use to send a reply. If a recipient replies to your emails by clicking ‘reply’, the email will be sent to this address instead of the address from which you are sending the email. - Review the information to make sure that all the information you intend to save is correct.
- Then click the Send Test Email button.
- Type an email address that you know you can immediately access.
- Click OK and a message will be sent to the email address you specify.
- Check to see if you received an email message with the subject “TEST Email” from the ‘From’ Email Address or from the ‘Reply to' Email Address (if used) address you entered.
- After receiving the test email, click the OK button on the Setup SMTP Email screen to complete the email setup.
- If you get an error message that your test email failed, verify your SMTP Settings by contacting the customer support for your Internet Service Provider (ISP).
Once you have completed the setup as described above, please reference the topic Send Email or Email Donations Statements for specific information on choosing recipients and composing your message.
